At Enlightened Marketing we run a LOT of traffic from Facebook to various clients’ stores. In almost every ads manager the first thing we set up (and often the most profitable) are Dynamic Product Ads.
This is also one of the easiest campaigns to keep running. Once it’s set up you just let it run, Facebook takes care of the rest. And if you follow what I’m about to show you, even the “setting up” part will be easy.
Note: To run Dynamic Product Ads you must have the Facebook Pixel installed on WooCommerce. For a detailed guide on that, click here.
Once you have your pixel installed, head back over here and set up your Dynamic Product Ads by follow the steps below.
1.) Install the plugin to create your product feed
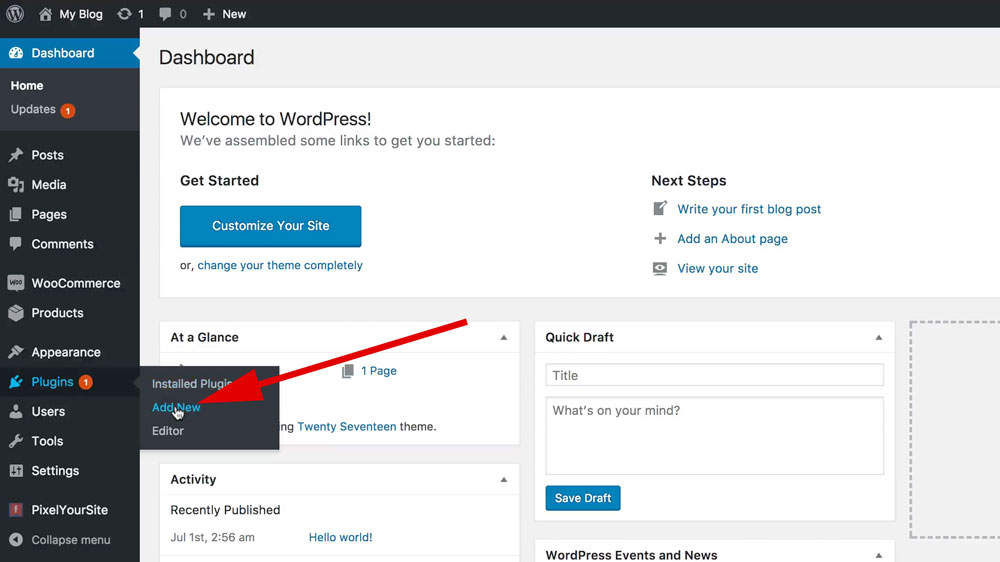
For this to work you’ll need a “feed” with all of your products that Facebook can read. This plugin will automatically create one for you. From your WordPress dashboard hover over “Plugins” and then click on “Add New.”
![]()
In the search bar at the top right type in “pixelyoursite” to search for the plugin.
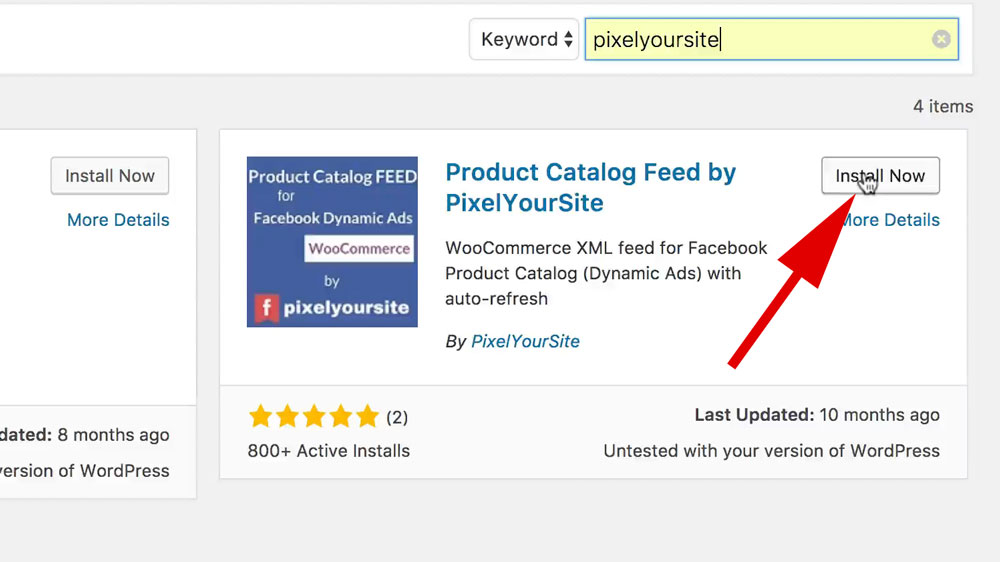
Now look for the plugin called “Product Catalog Feed by PixelYourSite.” This is the plugin you want. Click “Install Now” to install the plugin.
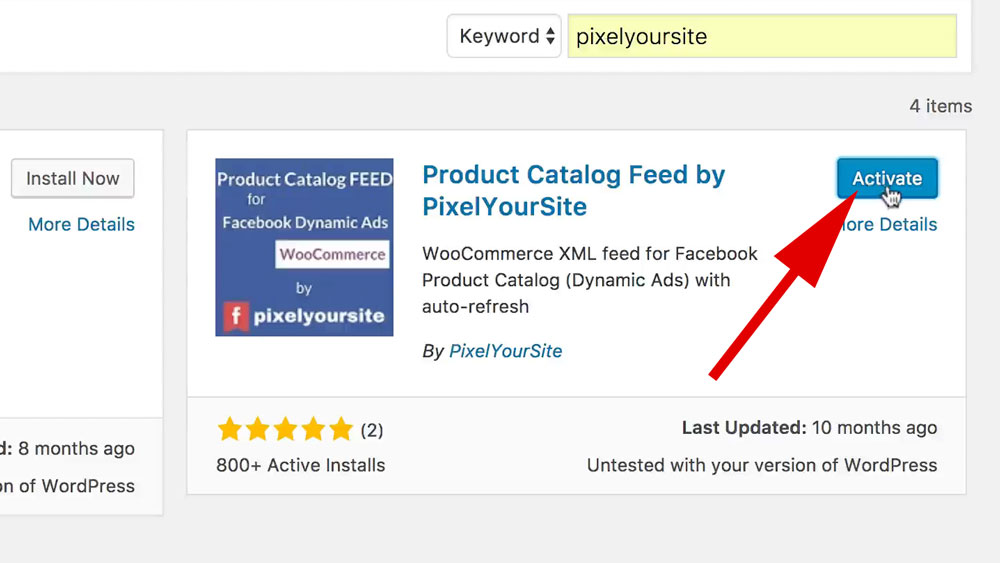
After you install the plugin the button will turn blue. Click “Activate” to activate the new plugin.
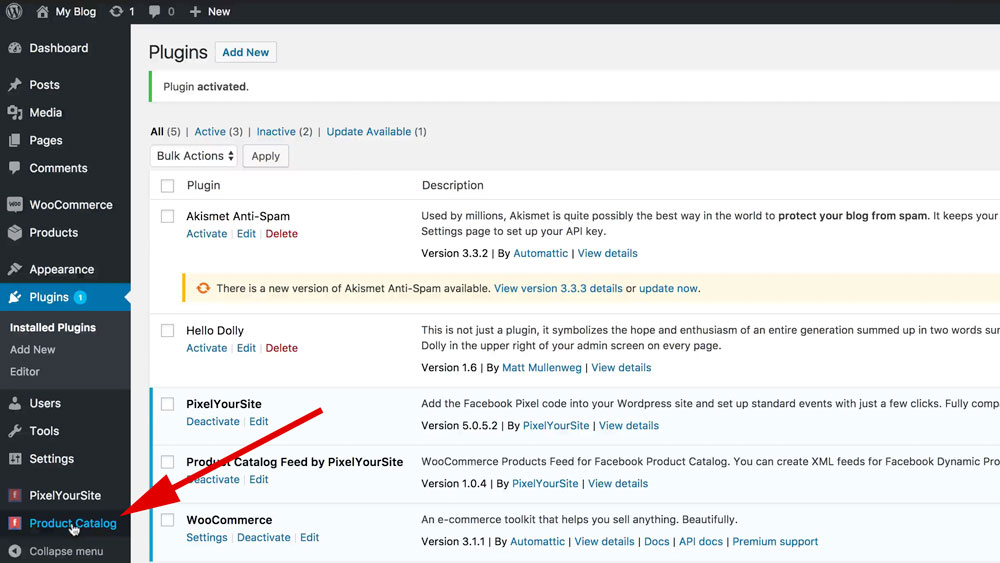
Now that the plugin is installed you’ll see a new icon in your WordPress menu on the left side of the page. Click on “Product Catalog.”
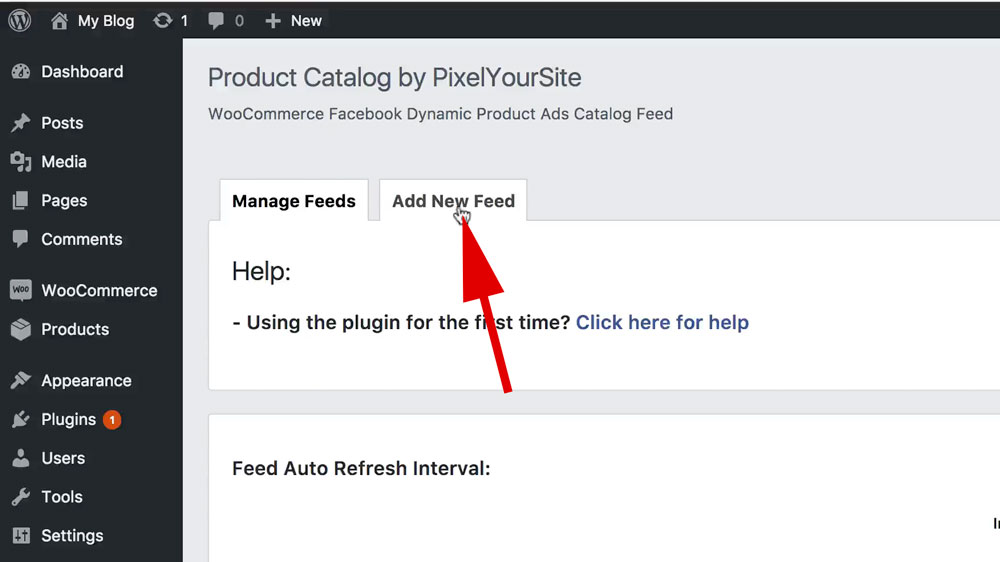
Next click on the “Add New Feed” tab on the Product Catalog page.
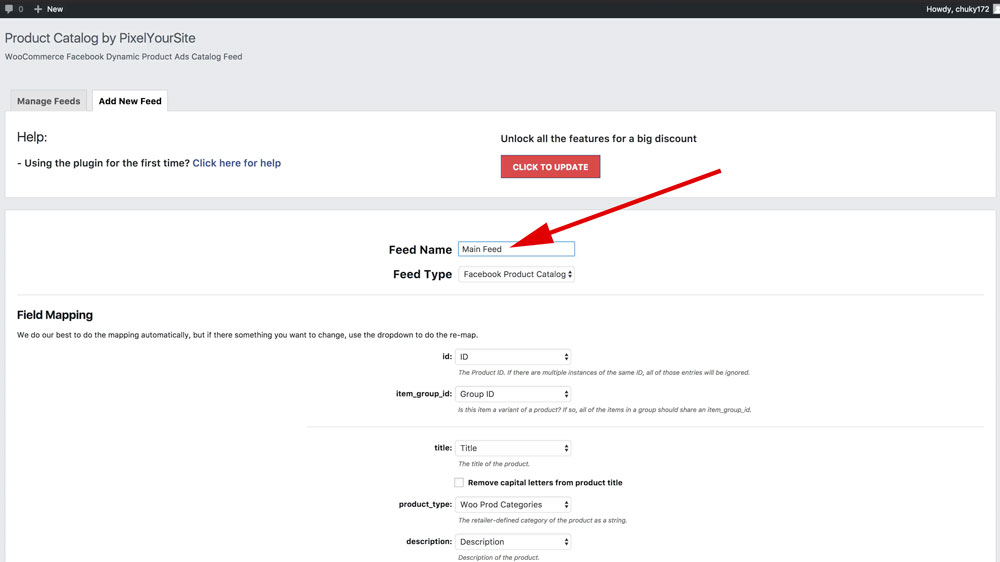
Next give your product feed a name. This can be anything. Just something that makes sense to you. I’ll usually call this “Main Feed” if I’m using this feed for all products like I’m showing you here.
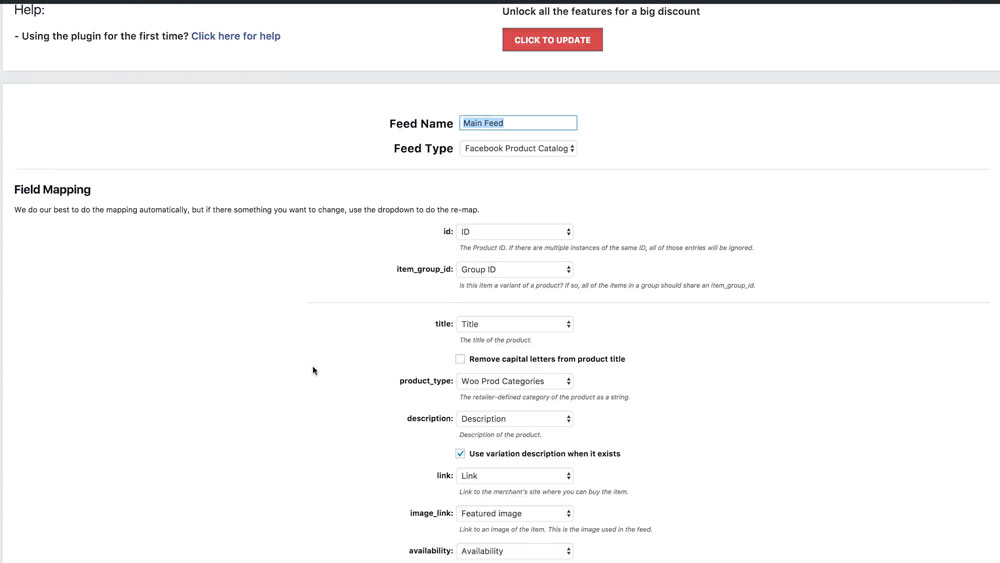
As you scroll down through the page there are quite a few different settings. These are to customize the feed. For most people the default settings will be fine. Very rarely do I need to change these.
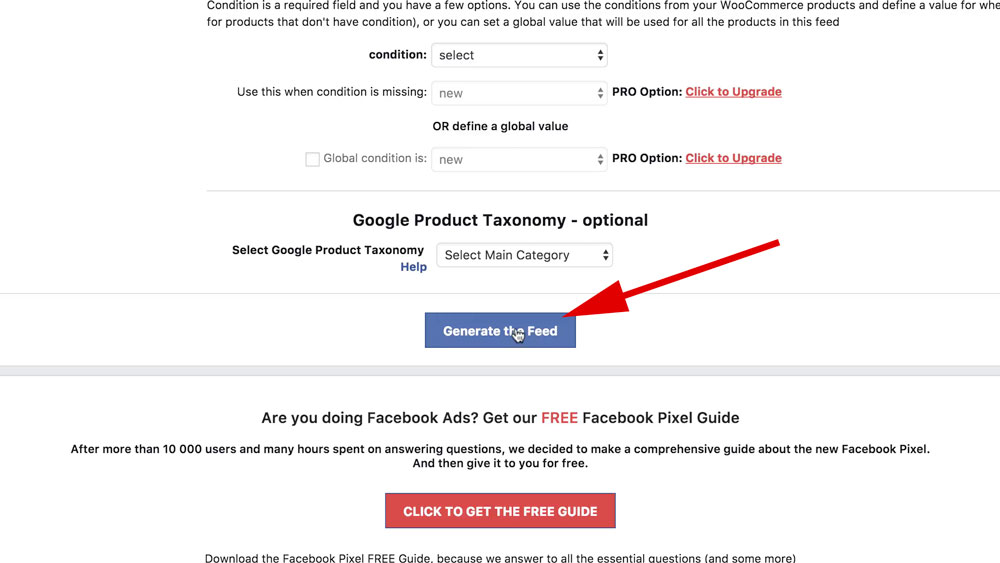
Next, scroll all of the way down to the bottom of the page and click “Generate the Feed” to create your product feed.
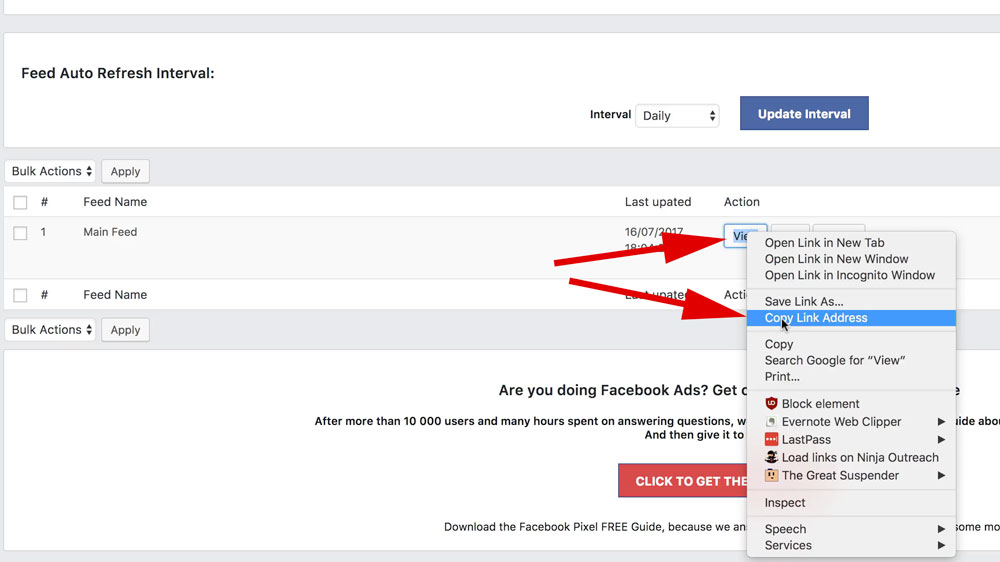
Now your feed is all set up! Now all you need to do is copy the feed URL. You can do this by right-clicking the “View” button in your feed under “Action” like you see in the image above. Then click “Copy Link Address.”
After you save your settings you need to grab your feed URL and take it over to your Facebook Ads Manager.
2.) Go to the product catalog
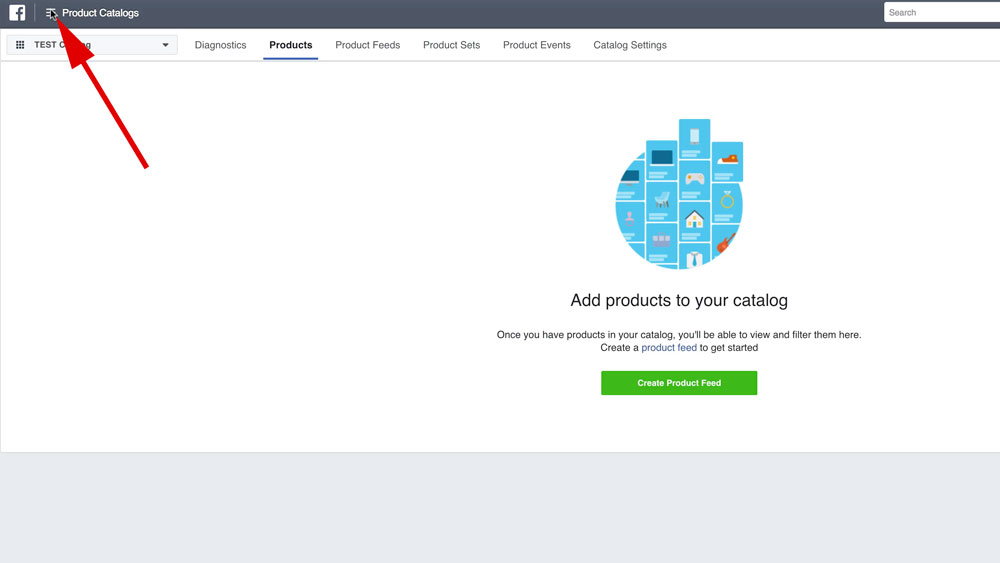
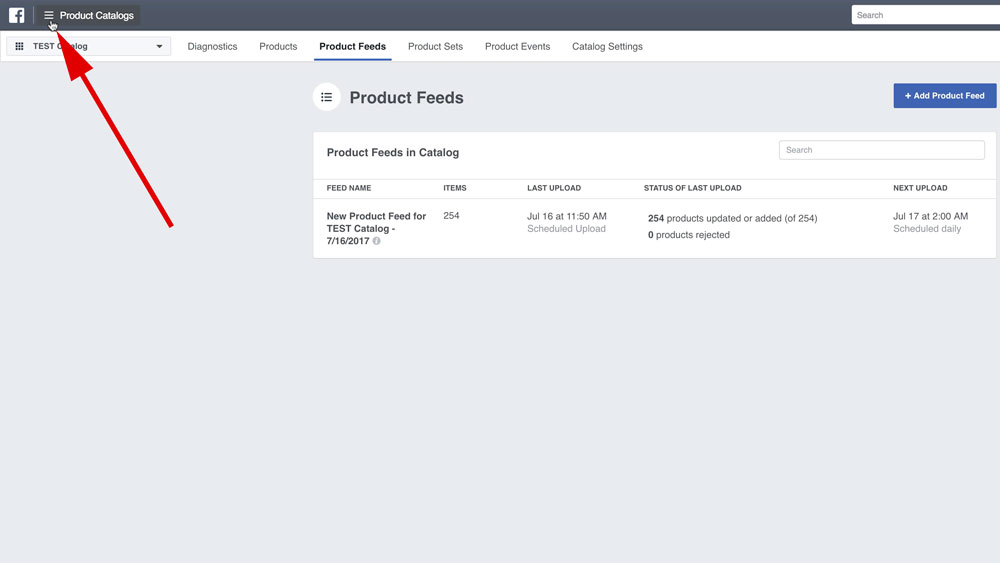
From your Facebook Ads Manager, click on the hamburger menu on the top left of your screen.
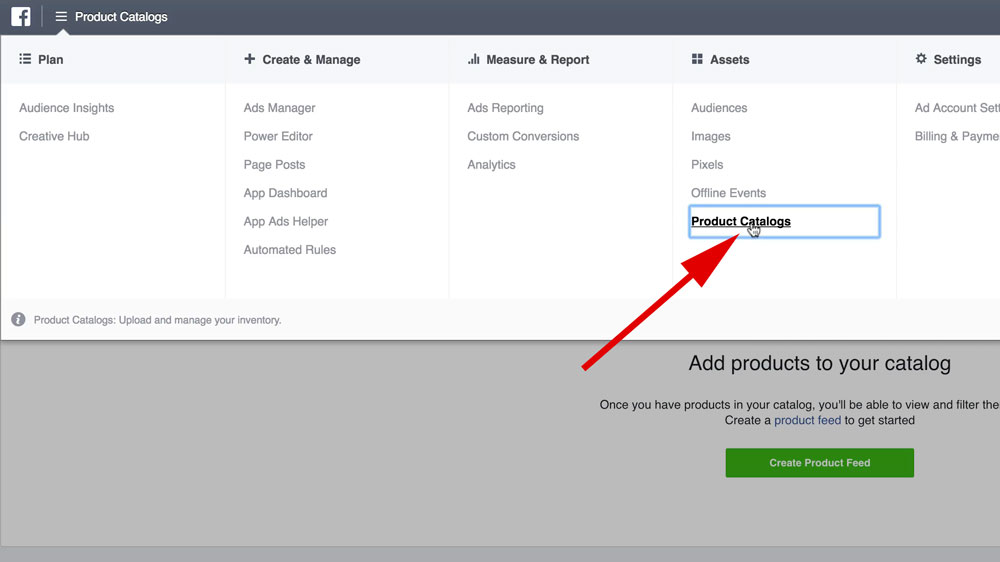
Next, click on “Product Catalogs” under Assets in the expanded menu.
3.) Create a new product feed
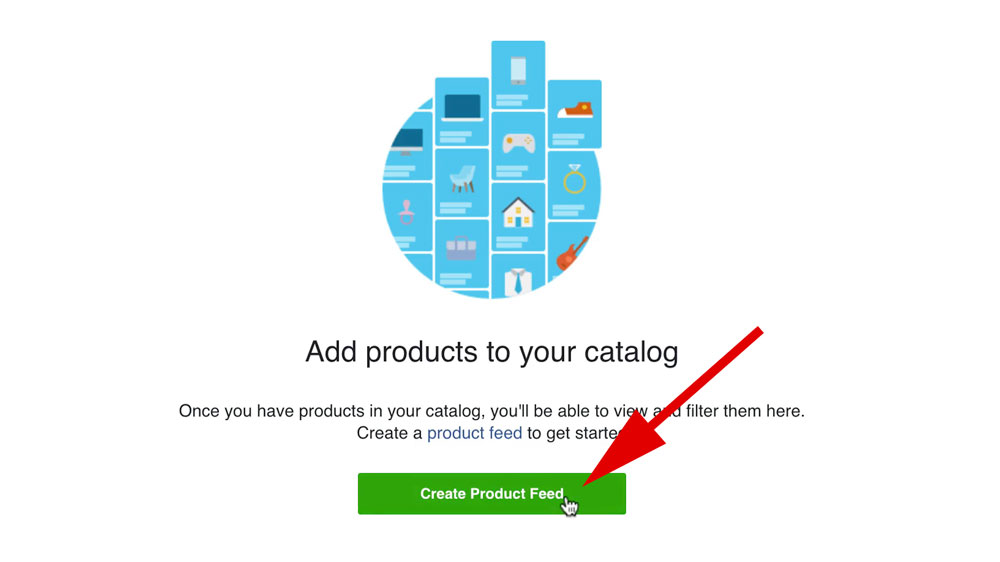
Click the green “Create Product Feed” button to create your first product feed.
4.) Select the settings for your product feed
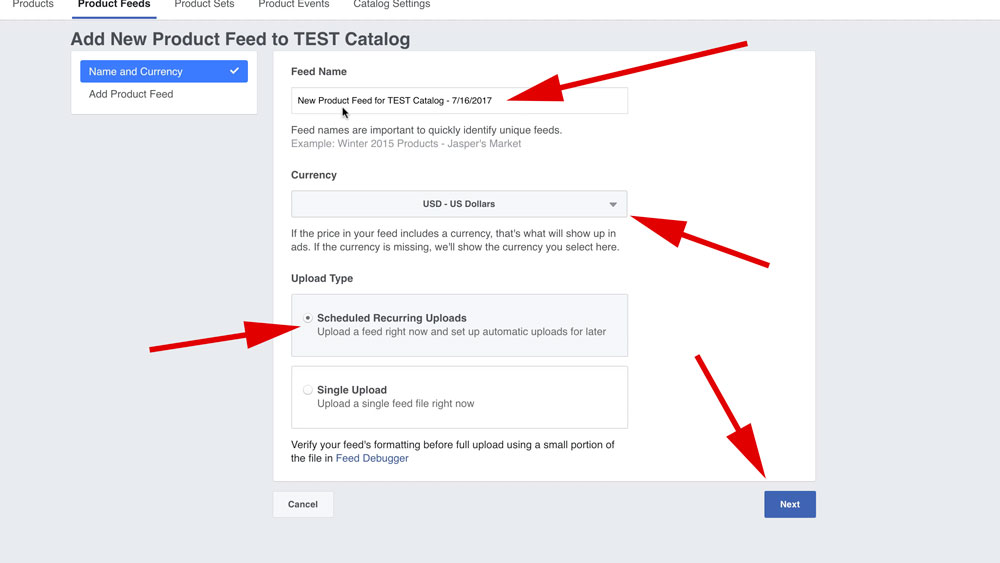
On this page you need to give your feed a name, set the proper currency and select your upload type. You can name it whatever you like. I usually leave it at the default. The currency should be whatever currency your store uses. The upload type needs to be “Scheduled Recurring Uploads.” Once you check all of these settings click “Next.”
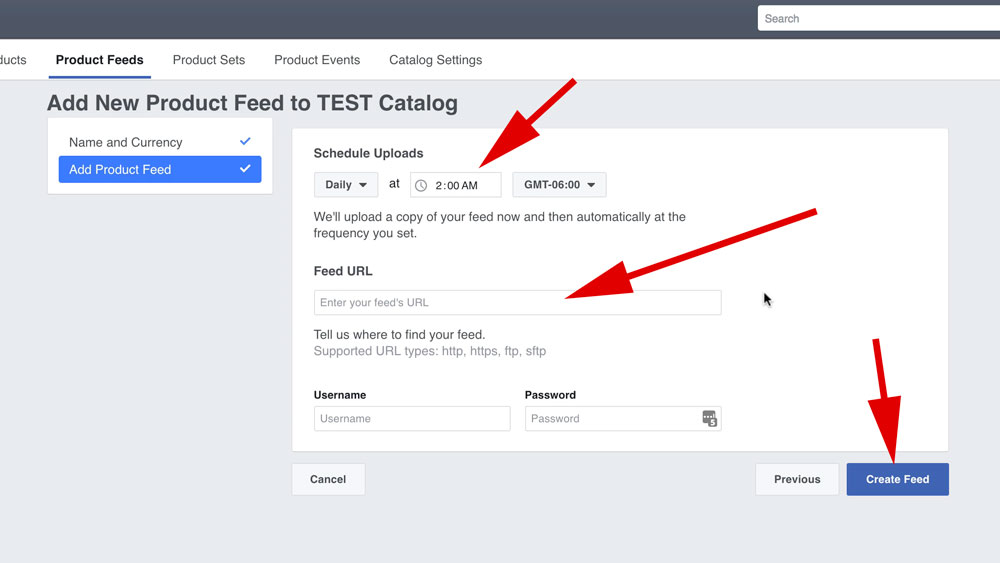
Now you need to schedule the upload time and add your feed URL. The “Schedule Uploads” can be whatever you want. I like to set it early in the morning. That way Facebook is getting the list of available products before most of the ads start showing that day. The “Feed URL” area is where you’re going to paste the URL from your the Flexify app from Step 9 above. Once you set the upload time and paste your feed URL click “Create Feed.”
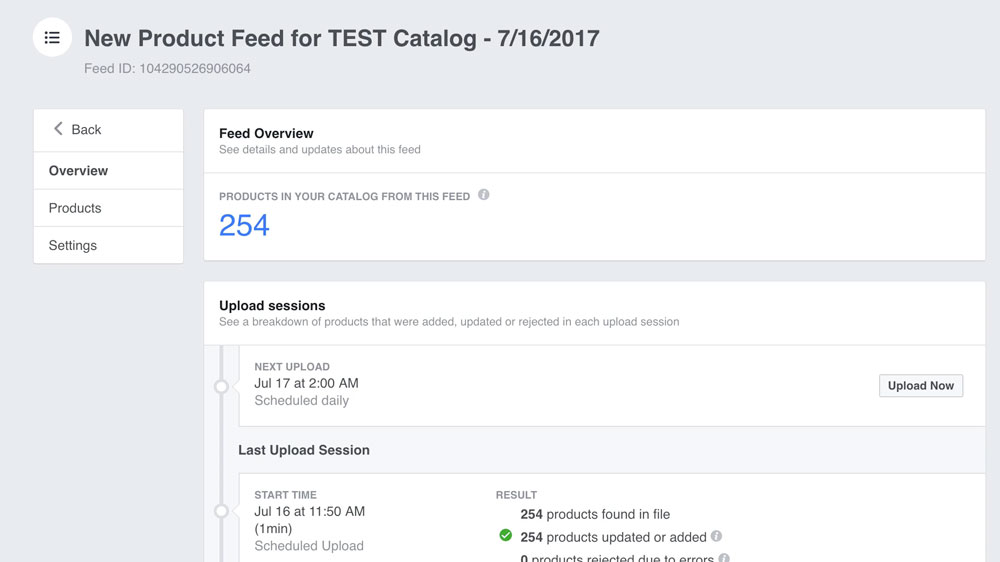
Congratulations! You now have a product feed and can begin creating your ad!
5.) Go back to Ads Manager
After your product feed is set up you need to go back to the Ads Manager. Click on the hamburger menu in the top left.
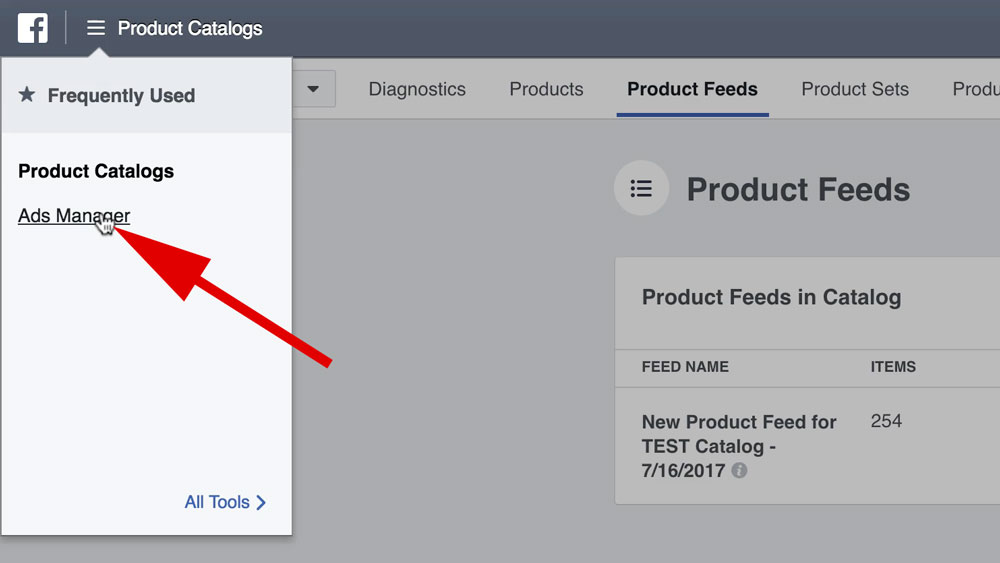
Then click on “Ads Manager” from the popup menu.
6.) Create your Dynamic Product Ad Campaign
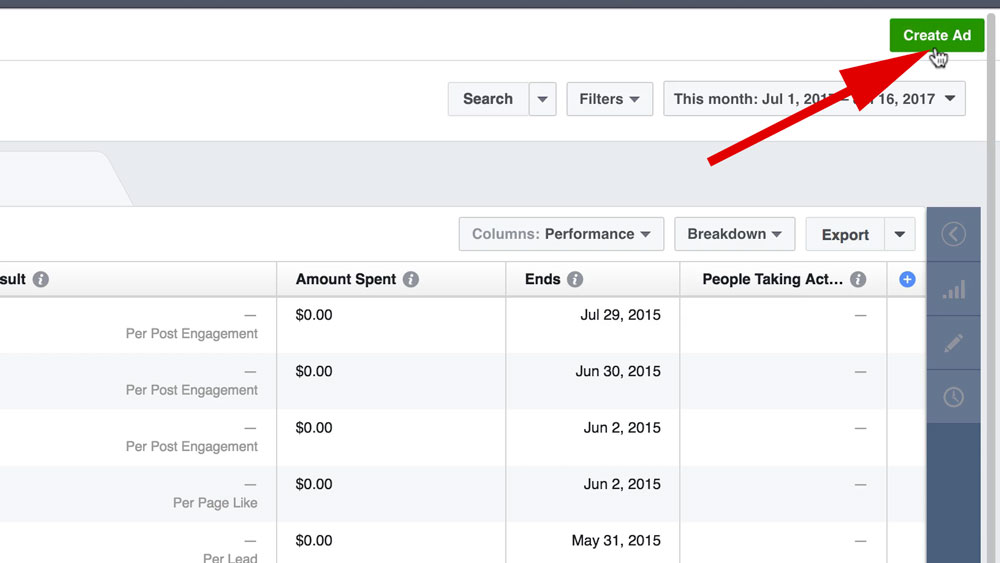
Once you’re in your ads manager click on the green “Create Ad” button in the top right of the page.
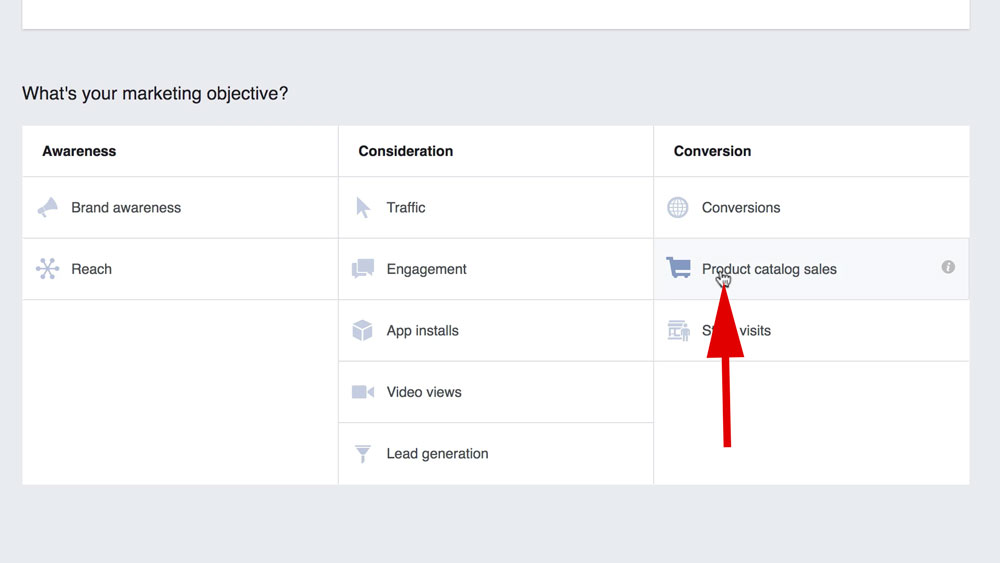
Click on “Product catalog sales” as your marketing objective.
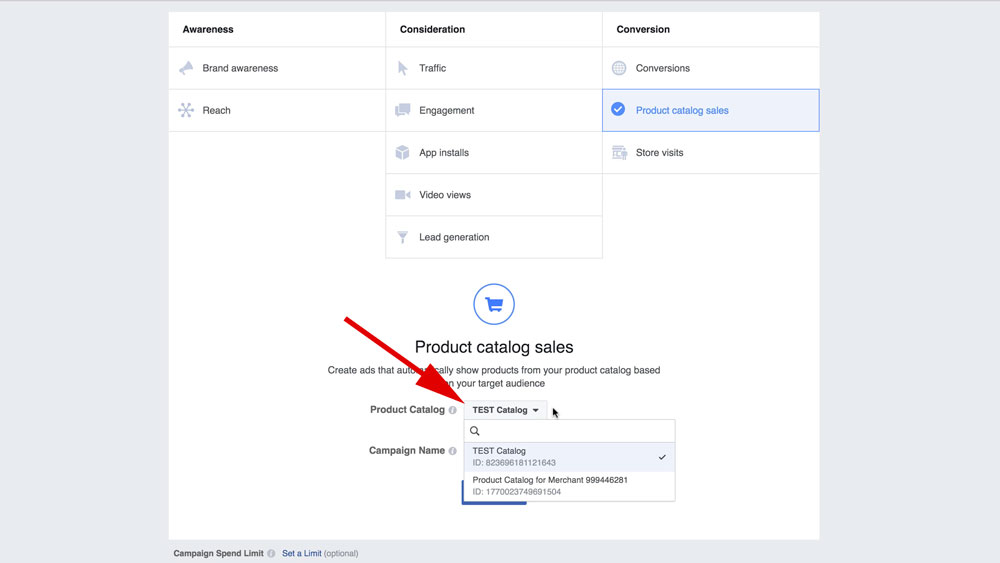
Now make sure the correct product catalog is selected. If the one you just created was your first catalog then it will be your only option.
7.) Choose what you’re going to show to who
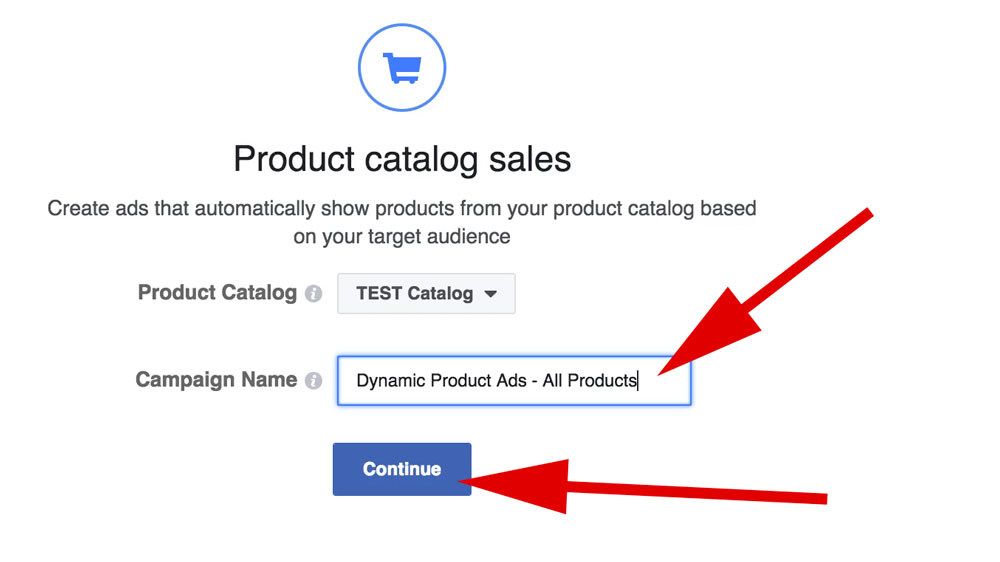
Give your campaign a name. I’ll usually name it something like “Dynamic Product Ads – All Products” if I’m creating an add using a catalog with all products. Once you’ve selected the correct product catalog and named your campaign click “Continue.”
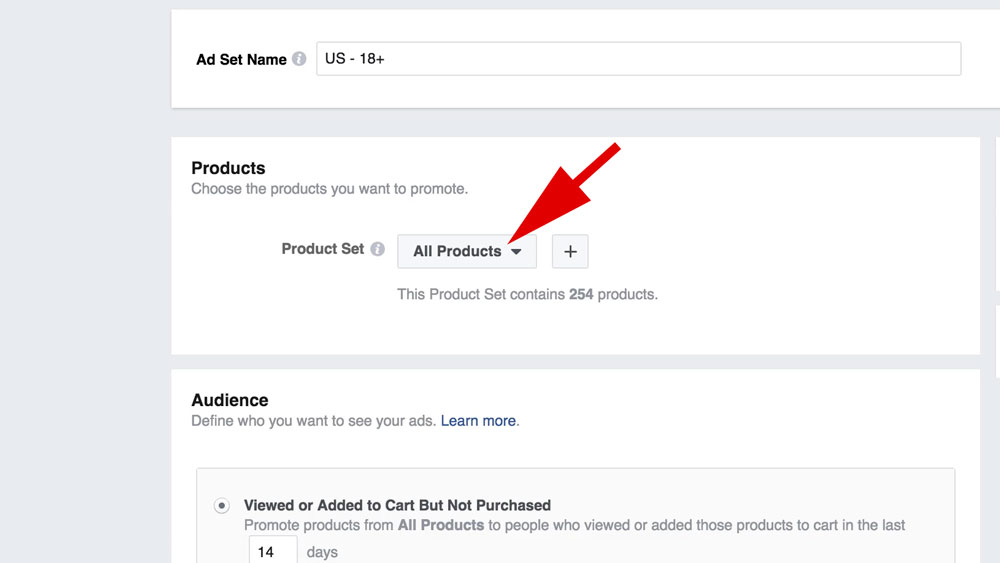
Again, if this is your first time creating a product catalog, then you will probably just have one option here for “All Products.” If you created a different, more specific product set then select it here. If you didn’t just leave it set to “All Products.”
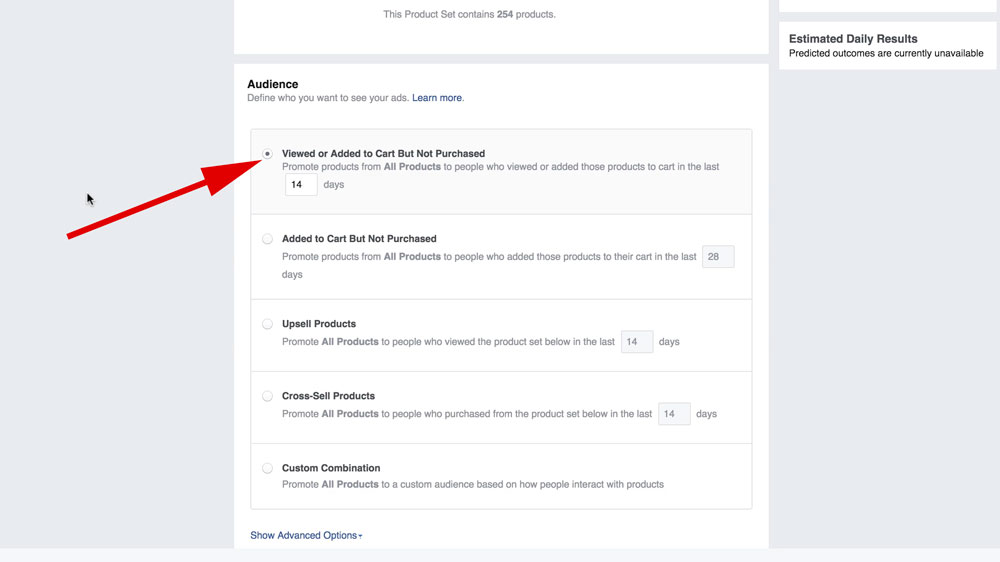
Under Audience here you’re choosing who you are retargeting.Your biggest and best audience to start with are visitors that either Viewed or Added to Cart but did not purchase. Go ahead and check this option. Leave it set to 14 days.
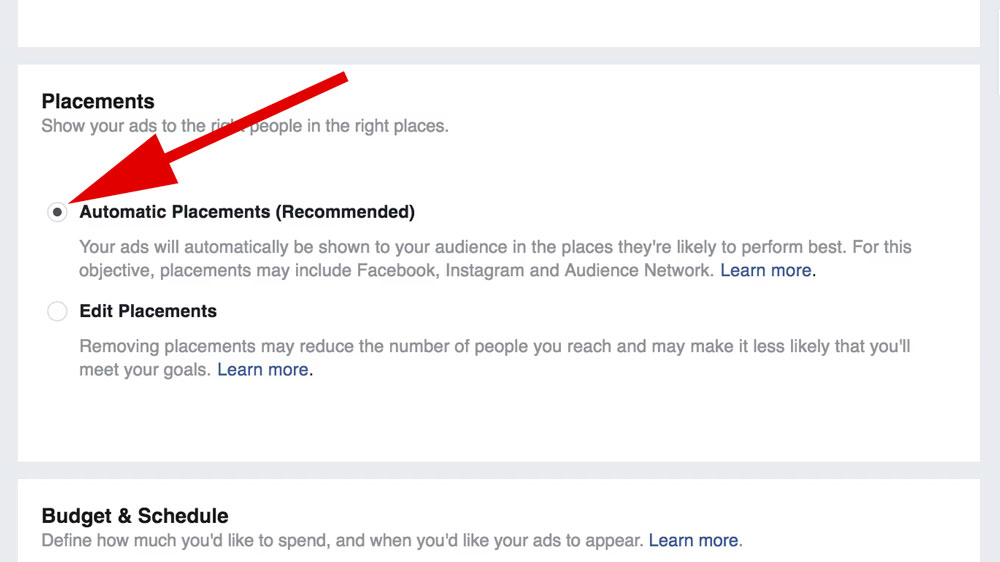
Placements are different places that your ad will be shown. Places like the newsfeed on desktop, newsfeed on mobile, the sidebar, Instagram and other apps. You can customize where you’d like your ads to show and not show, but I recommend leaving it set to “Automatic Placements” for now.
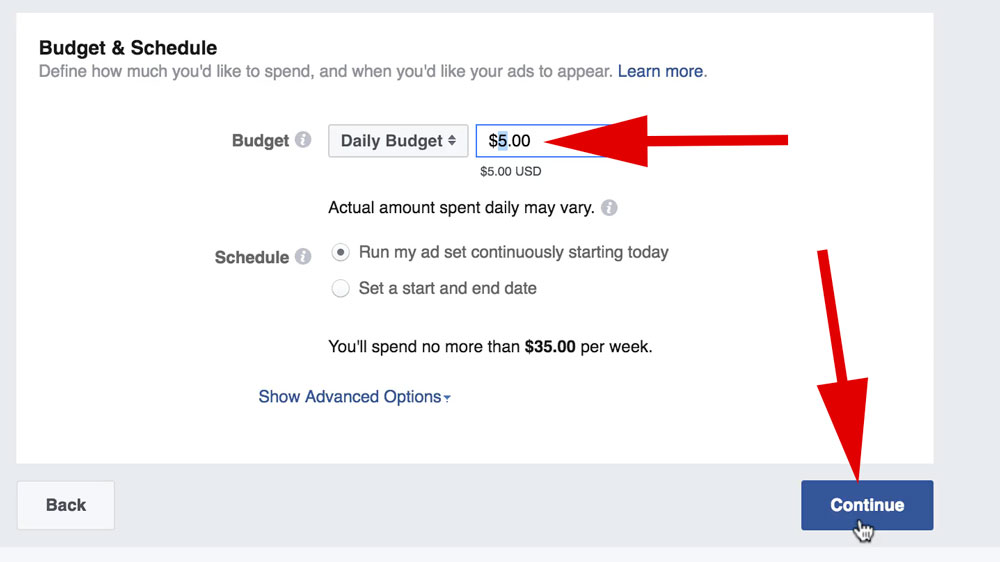
Here, under “Budget & Schedule,” you’ll choose how much you want to spend and when. I recommend spending at leas $20 per day if you can. Bare minimum $5 per day. This should be one of your top performing campaigns, so you’ll want to give it something to work with.
8.) Create your ad
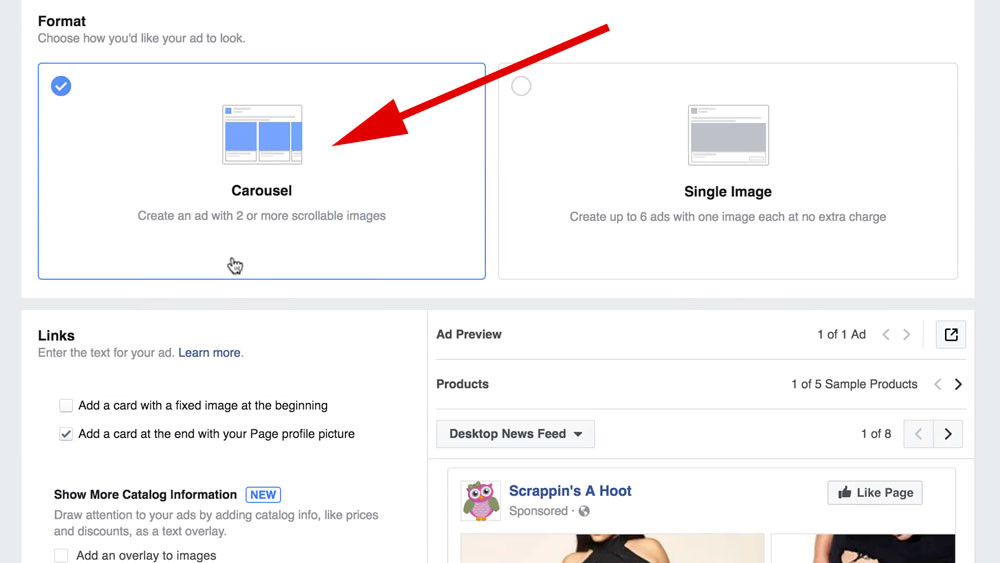
Here you’ll select the format that your ad is in. You can either choose “Carousel” or “Single Image.” The carousel will pull in multiple products and images from your store and allow the user to scroll through them. The Single Image will only show one product at a time. I recommend leaving this set to Carousel.
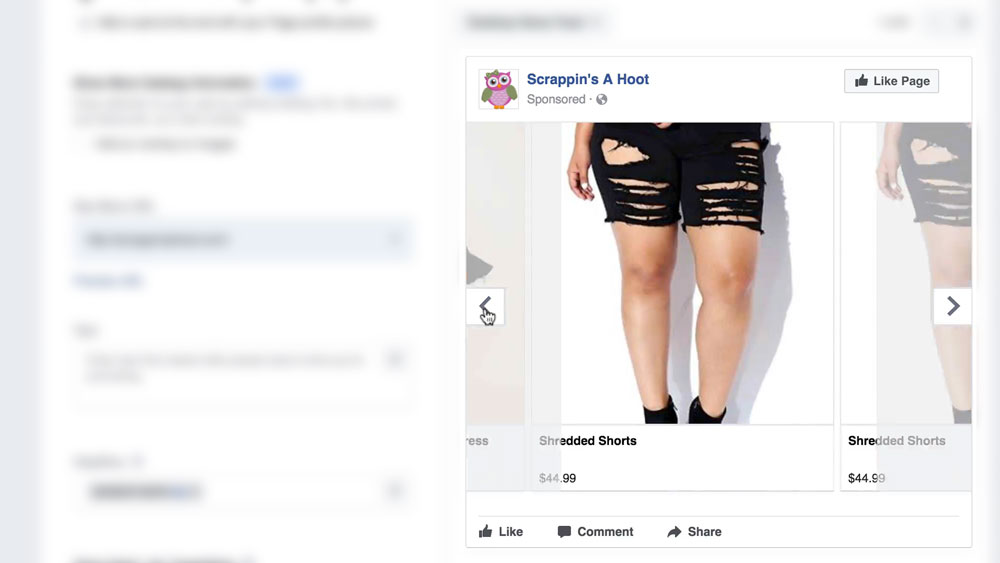
This is an example of what the Carousel ad format looks like.
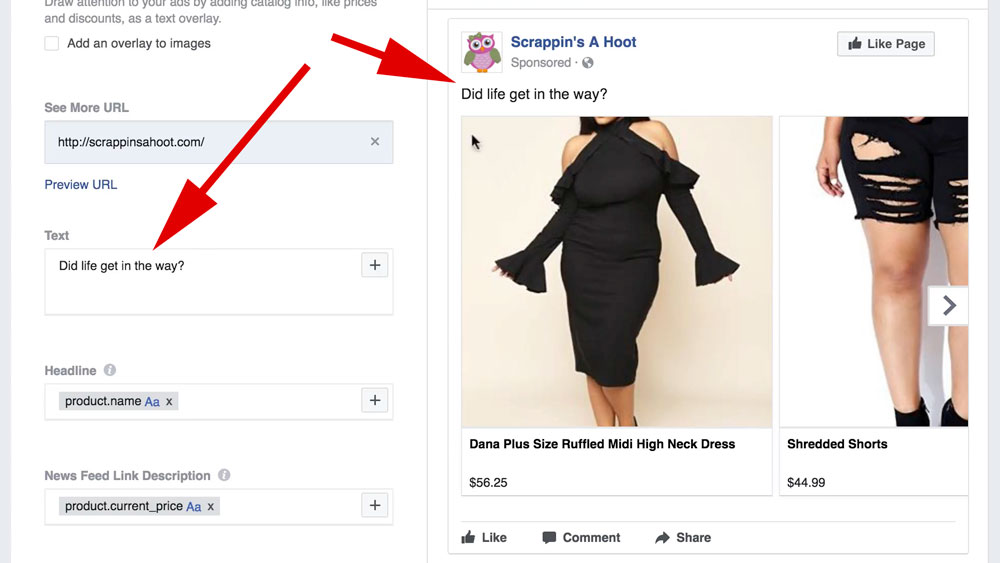
Here you will add the text for your ad. Whatever you put in the “Text” field shows up above the images. We like to use “Did like get in the way?” here. Remember, you’re showing these ads to people who were already interested in and looking at your product. Some even added it to their shopping cart! We’re assuming that they didn’t say “No”, life just …got in the way.
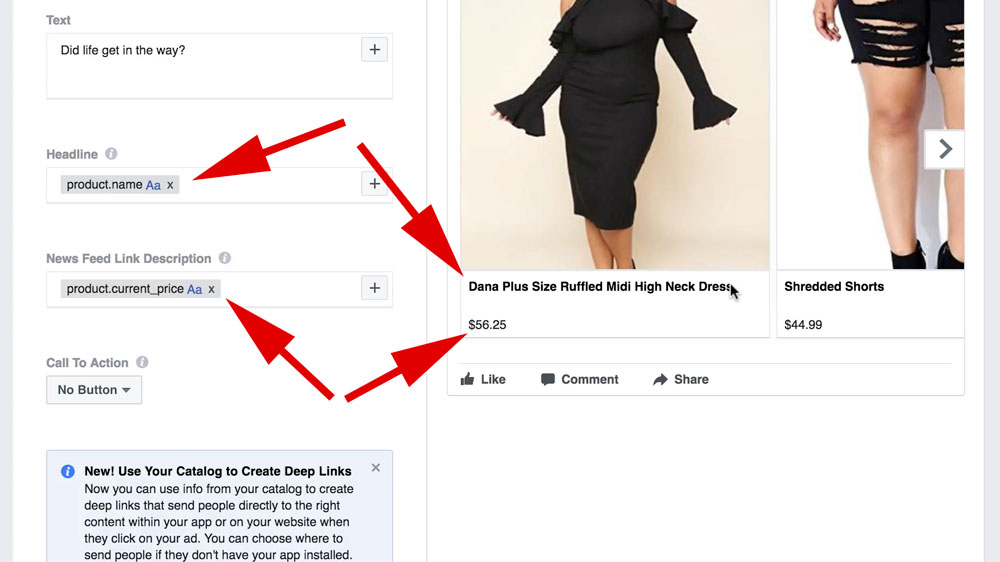
Next, you need to add the Headline and News Feed Link Description. We recommend just leaving this as they are. The Headline, with “product.name” in it, will pull in the name of the product from your product feed. The News Feed Link Description, with “product.current_price” in it, will pull in the products price from your feed. There are other options available here if you click on the plus signs (+) next to the fields. You can also add text before and/or after these special tags.
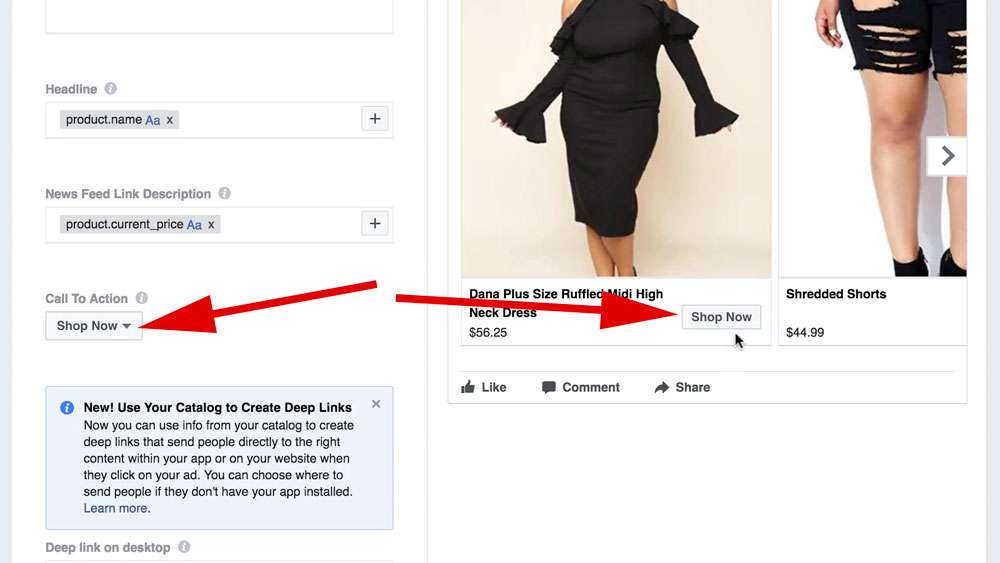
Here you can choose the Call to Action button that will show up under your products. We recommend just selecting “Shop Now.” That is what you want your audience to do after all 🙂

Now click “Place Order” to finish the ad creation.
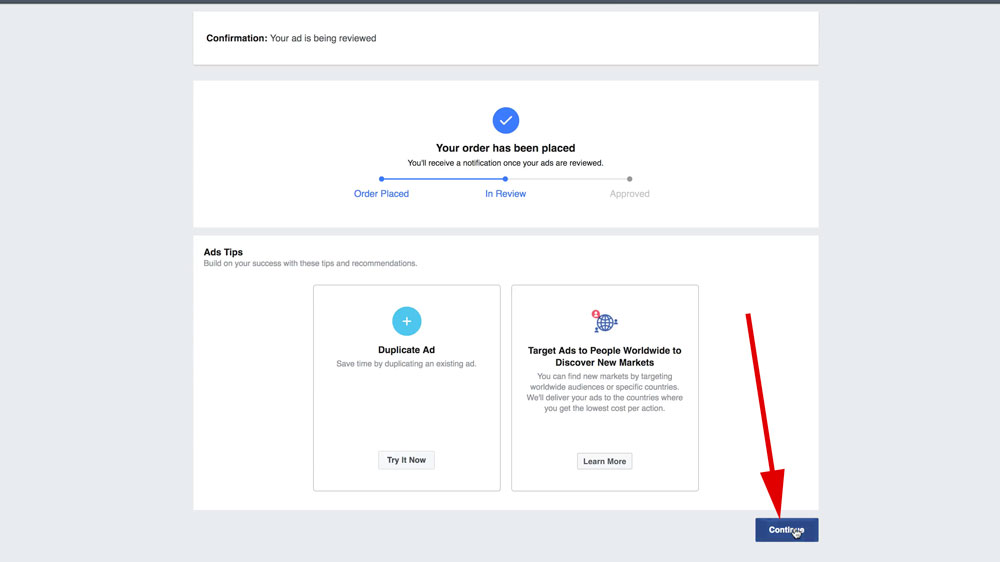
And that’s it! You’re done! From here click “Continue” and wait for your ads to be approved by the Facebook team.
I really hope you got a lot of value from this walkthrough. Please, leave us any input, comments or questions isn the comments section below. We’d love to hear from you!
Also, if you’d like to learn more about what Facebook Ads can do for your online store, check out our up-coming webinar on The EASY 3-Step Facebook Ads Blueprint That Instantly Increases Your E-Commerce Sales.