If you’re sending, or planning to send, Facebook Ads to your Woocomerce store then you MUST have the Facebook Pixel installed. If you don’t you’re using a very small portion of the Facebook Ads platform’s capabilities.
At Enlightened Marketing, we’ve set up and managed Facebook Ads campaigns on a number of Woocommerce installations and have seen many different ways to implement the Facebook Pixel. This article will show you the easiest way we have found to install the Facebook Pixel on your Woocommerce store.
Watch the video or follow the step-by-step instructions below get the pixel installed.
Learn the Easy 3-Step Facebook Ads Blueprint That Instantly Increases Your E-Commerce Sales
Step 1: From Your WordPress Dashboard Add A New Plugin
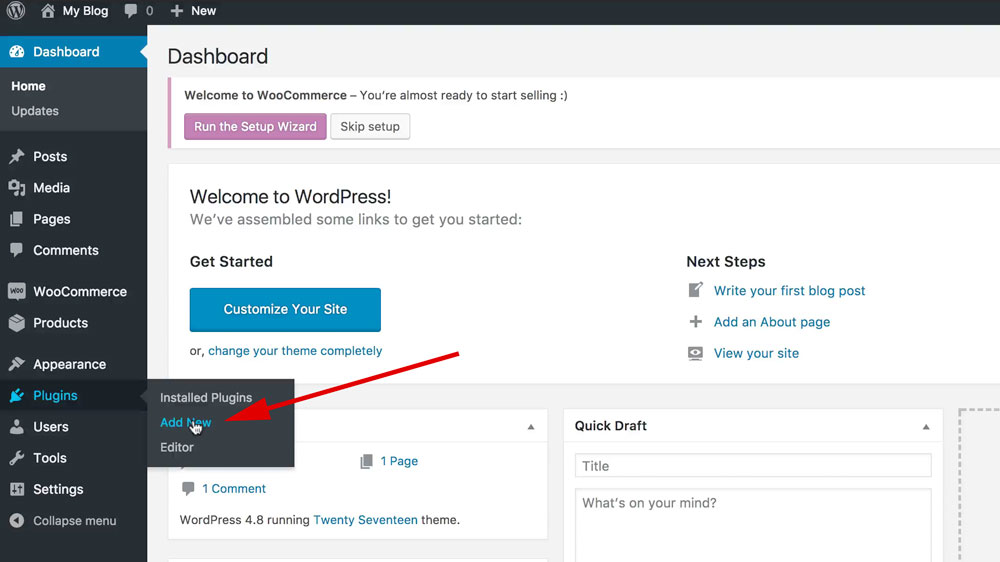
From your WordPress dashboard go to “Plugins” then “Add New.”
Step 2: Search For “PixelYourSite”
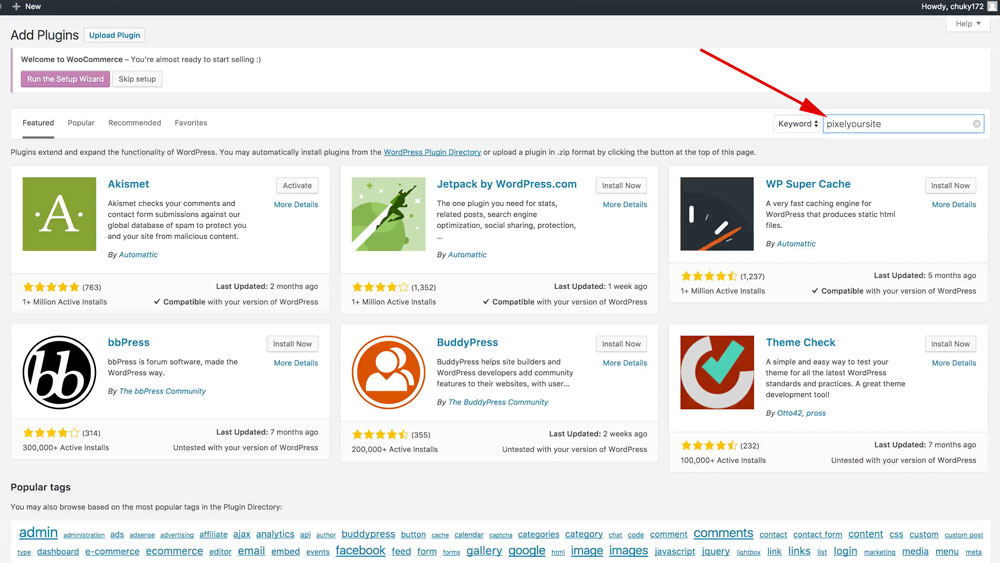
Once you’re at the “Add Plugins” screen type in “pixelyoursite” into the search box at the top right.
Step 3: Instal PixelYourSite
![]()
From here you should see a plugin called “Facebook Pixel by PixelYourSite – Events, WooCommerce & Easy Digital Downloads”. Click the “Install Now” button in that result.
Step 4: Activate PixelYourSite
![]()
Once the plugin is installed the button will turn blue and say “Activate.” Click this button and PixelYourSite will be activated in your WordPress site.
Step 5: Click the new PixelYourSite Icon
![]()
You will now see a new icon in your WordPress menu for “PixelYourSite.” Click on this icon to go to the new plugin settings page.
Step 6: Notice where you need to add your Pixel ID
![]()
The input field next next to “Add your Facebook Pixel ID” is where we need to ad your Pixel ID from your Facebook Ads account.
Step 7: Grab Your Facebook Pixel From Your Ads Account
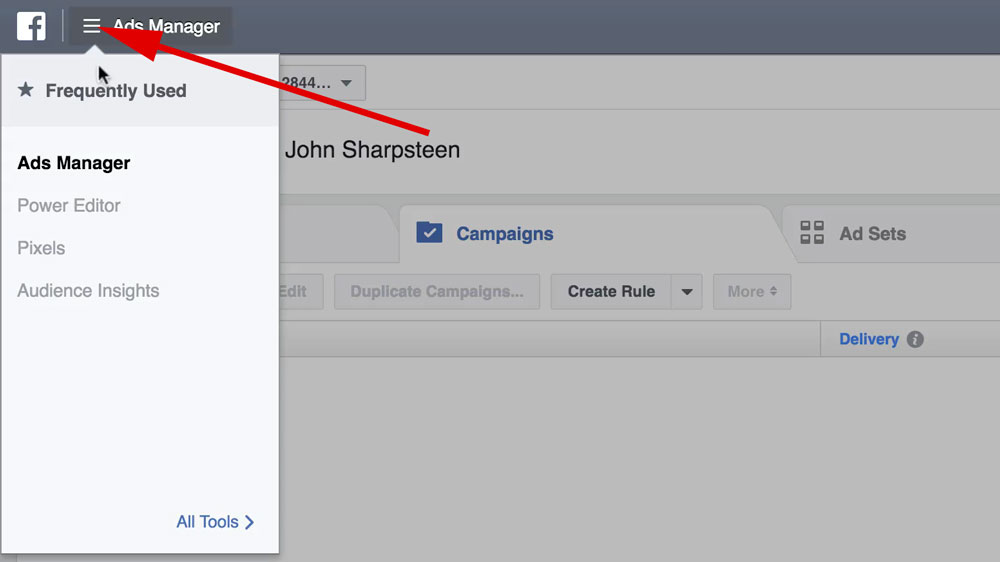
Head over to your Facebook Ads account. This is where your Facebook pixel lives. From here click on the Hamburger Menu in the top left like in the image below.
Now hover over “All Tools” at the bottom of the menu.
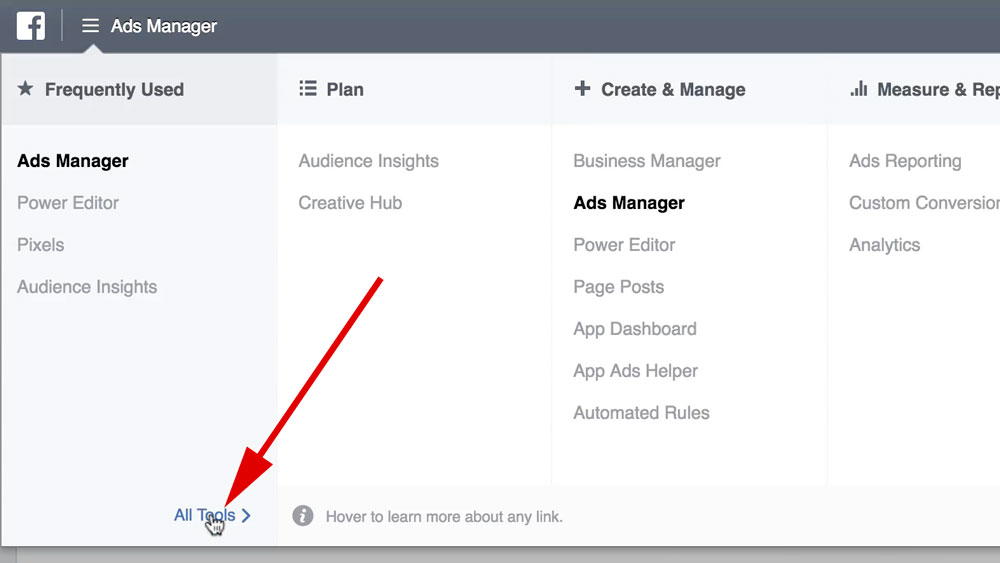
From there click on “Pixels” under “Assets.”
![]()
If this is your first time coming to this page then you will get a screen that looks like the image below. If you see this screen just click on “Create a Pixel.”
![]()
If you see this screen just click on “Create a Pixel”, give your pixel a name (you can just leave it at its default) and click “Next.”
![]()
When you see the screen below just click “Copy and Past the Code.”
![]()
You won’t need anything from the next window.
![]()
From the above screen, just scroll down and close the window.
![]()
Once you’re at the screen pictured above you just need to select your “Pixel ID” (just the numbers). Copy that and head back to your Woocomerce store.
Step 8: Add your Facebook Pixel ID to PixelYourSite
![]()
Now that you’re back in your Woocommerce store, paste the pixel ID that you copied from your Facebook Ads Manager and paste it into the “Add your Facebook Pixel ID” field in the PixelYourSite settings.
Step 9: Activate and Save Settings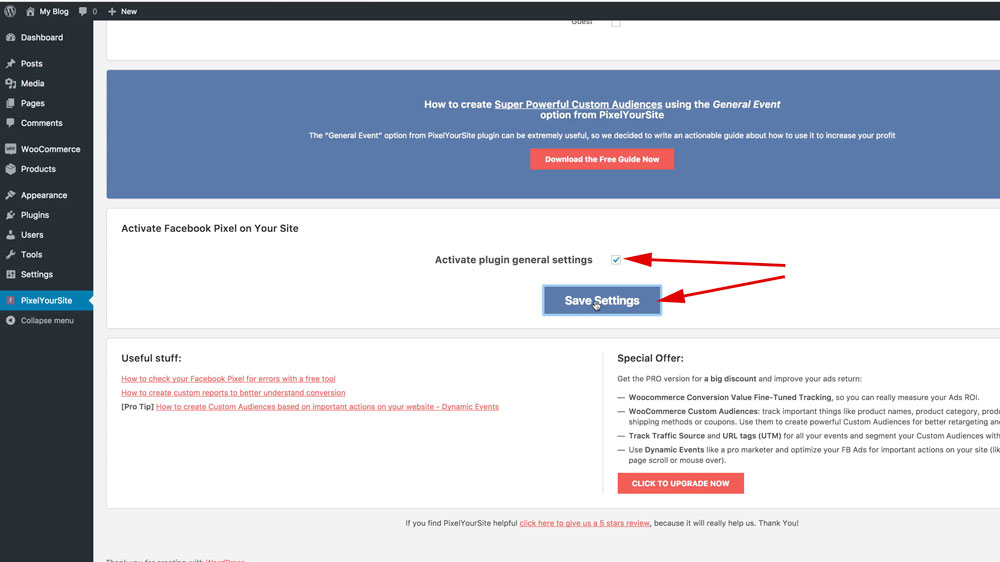
Scroll down to the bottom of the page and check “Activate plugin general settings” and then click “Save Settings”
Step 10: Go To “WooCommerce Setup” Tab
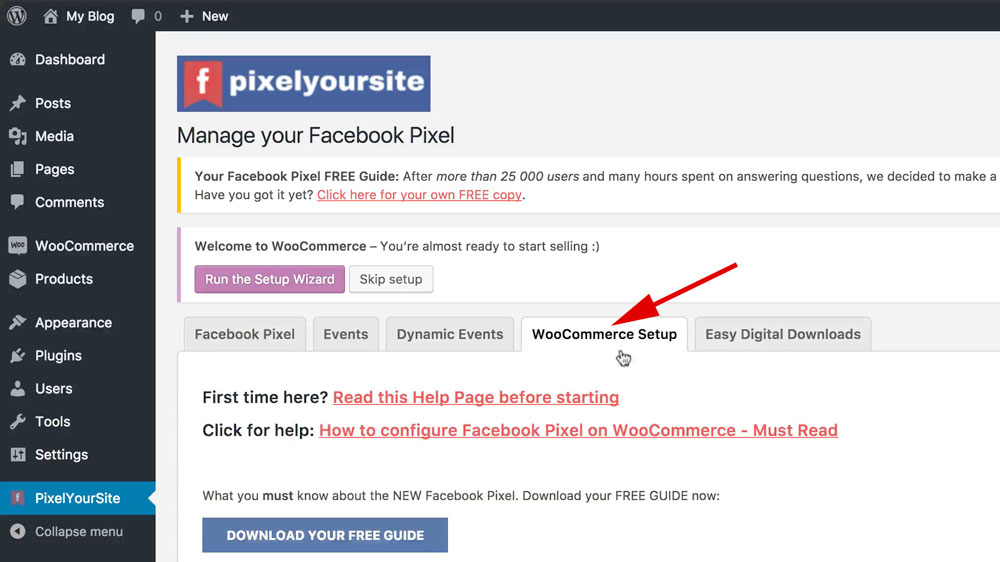
After you save your settings then click on the “WooCommerce Setup” tab.
Step 11: Make sure events are checked
Make sure all of the below boxes are checked.

Check “Enable Facebook Dynamic Product Ads.”
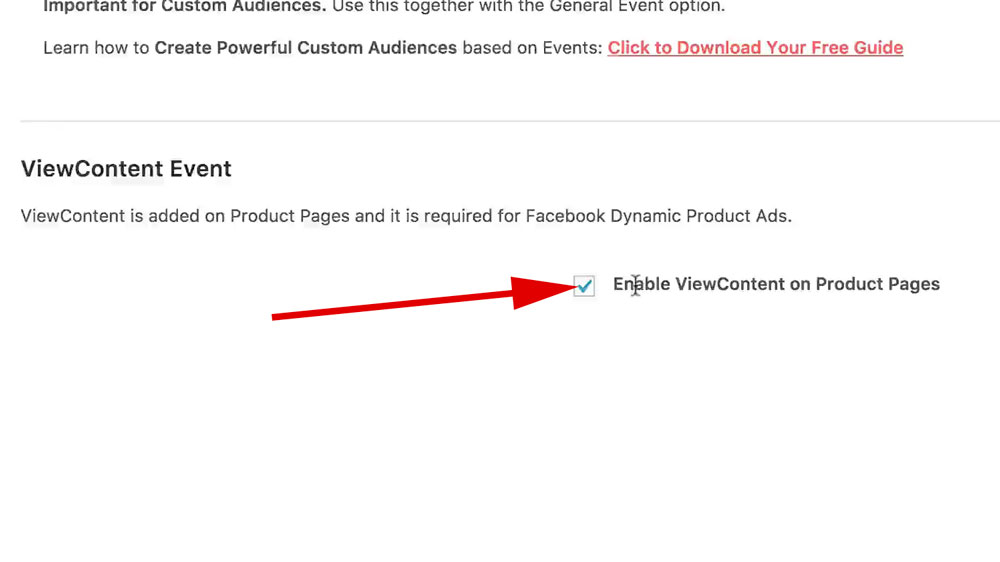
Check “Enable ViewContent on Product Pages”
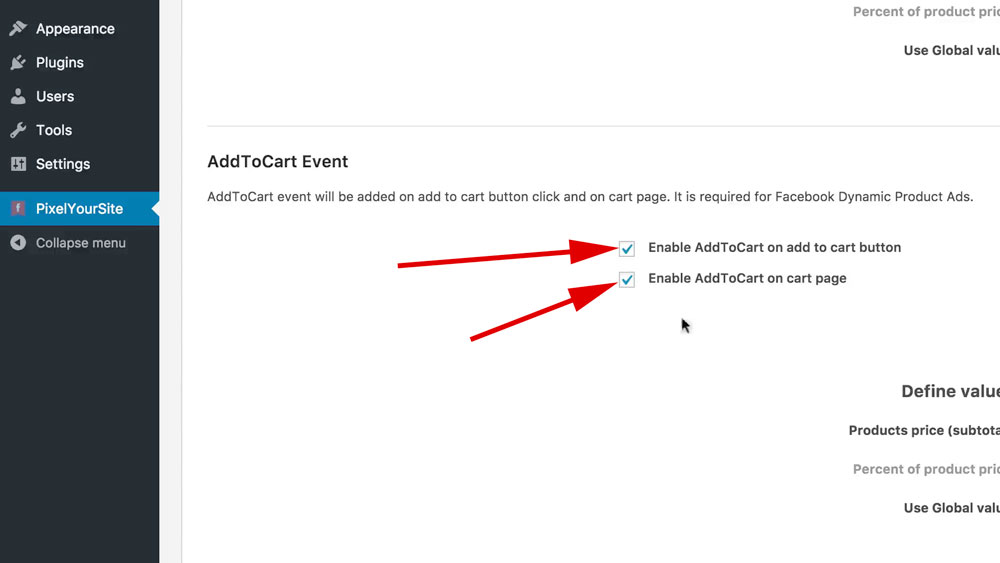
Check “Enable AddToCart on add to cart button” and “Enable AddToCart on cart page.”
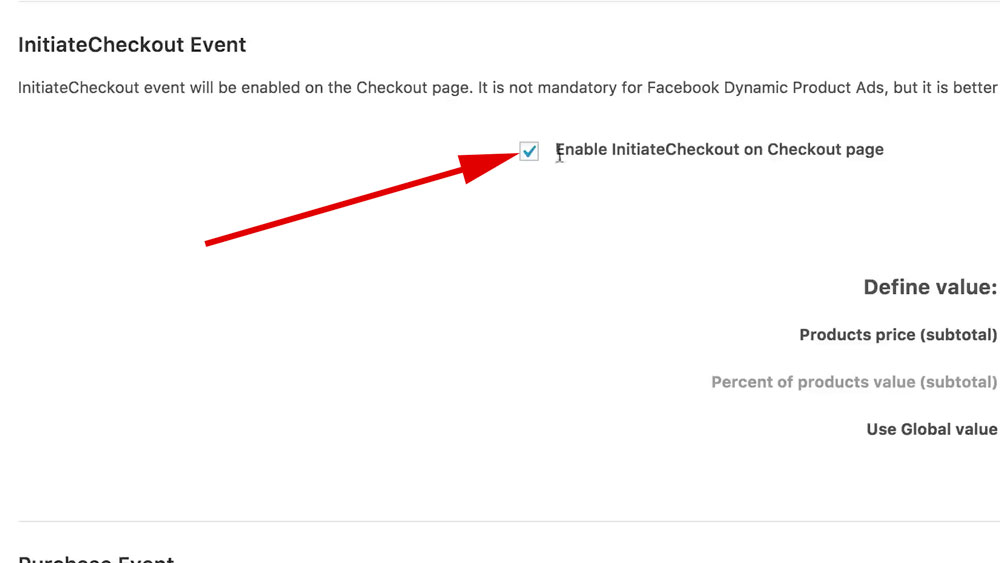
Check “Enable InitiateCheckout on Checkout page.”
Step 12: Activate and save WooCommerce settings
![]()
That’s it!
The Facebook Pixel is installed in your Woocommerce store!
The PixelYourSite plugin will add the pixel code to every page on your store. But, not only that, it will also fire off events based off of visitors actions, such as Product Views, Add to Cart and Purchases (that’s why we made sure all of those boxes were checked).
Now that you have the Facebook Pixel installed, you are on your way to better performing (and more profitable) Facebook ads!
To learn more about how you can use Facebook Ads to grow your online store and get more sales, sign up for our upcoming webinar where we go over the EASY 3-Step Facebook Ads Blueprint That Instantly Increases Your E-Commerce Sales.