If you’re running Facebook ads to your Bigcommerce store then you need to make sure you have the Facebook pixel installed. This will allow you to track and retarget your visitors and buyers…and even create audiences of new potential buyers based off of the people who have already bought.
The cool thing is Bigcommerce is one of the easiest E-Commerce platforms to install the Facebook Pixel on 🙂
Watch the video or follow the step-by-step instructions below get the pixel installed.
Learn the Easy 3-Step Facebook Ads Blueprint That Instantly Increases Your E-Commerce Sales
Step 1: Click “Advanced Settings” from your Bigcommerce Dashboard
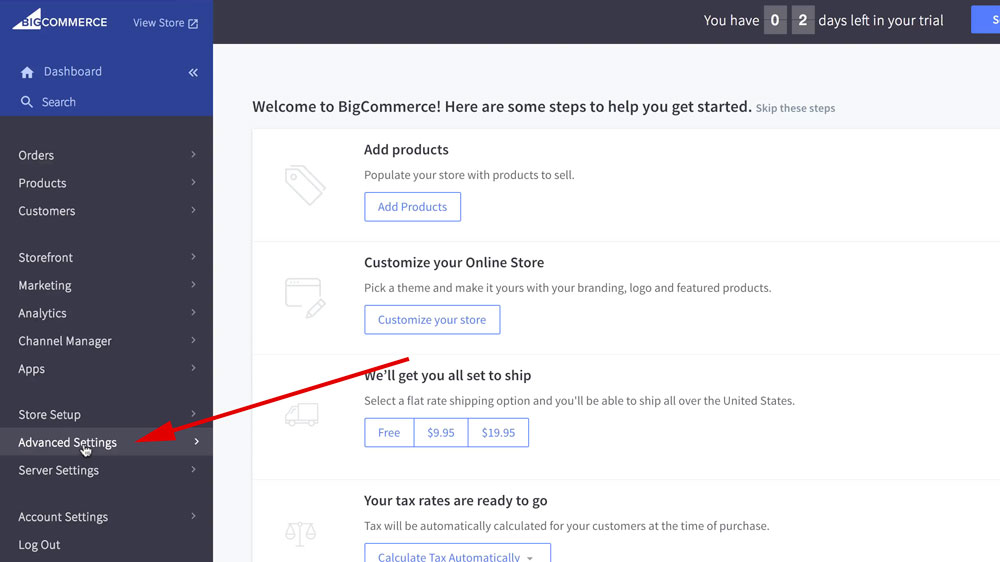
After you log in to your Bigcommerce store, click “Advanced Settings” from your dashboard.
Step 2: Click “Web Analytics” under “Advanced Settings”

Next, click “Web Analytics” under “Advanced Settings”.
Step 3: Check “Facebook Pixel” in the Analytics Packages Area
![]()
Once you’re on the Web Analytics page you’ll see “Facebook Pixel” under “Analytics Packages.” Check the box next to Facebook Pixel.
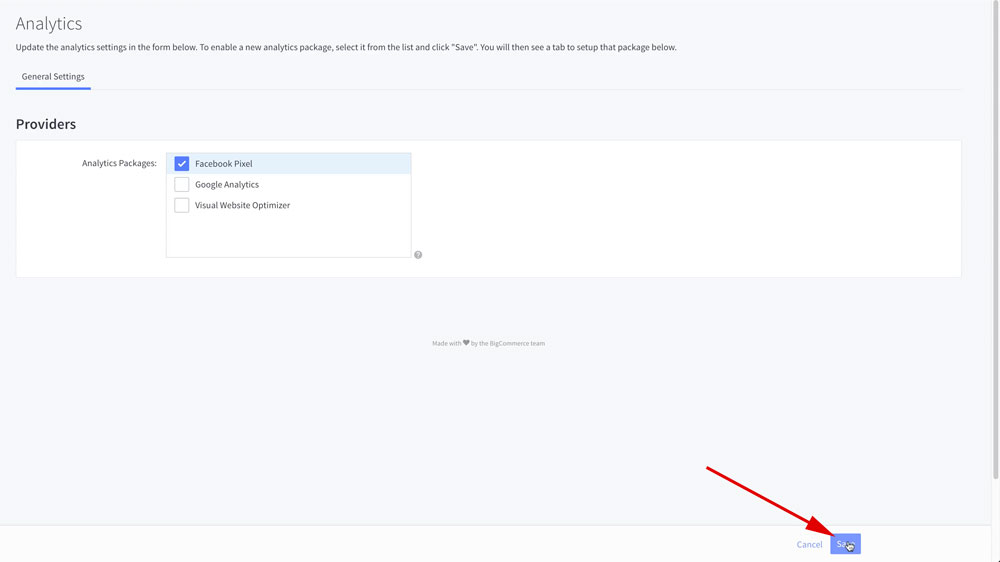
Then click “Save” at the bottom right of the page.
Step 4: Click on the New Facebook Pixel Tab
![]()
Step 5: Notice Where Your Facebook Pixel Goes
![]()
After you click on the “Facebook Pixel” tab you’ll see a field that says “Pixel ID.” This is where the Pixel ID from your Facebook Ads account goes.
Step 6: Grab Your Facebook Pixel From Your Ads Account
Head over to your Facebook Ads account. This is where your Facebook pixel lives. From here click on the Hamburger Menu in the top left like in the image below.
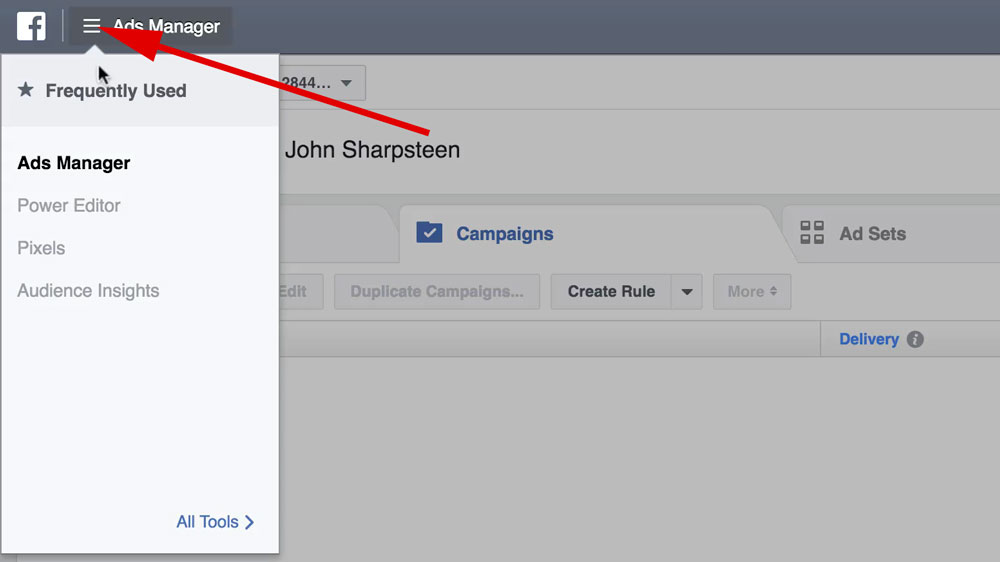
Now hover over “All Tools” at the bottom of the menu.
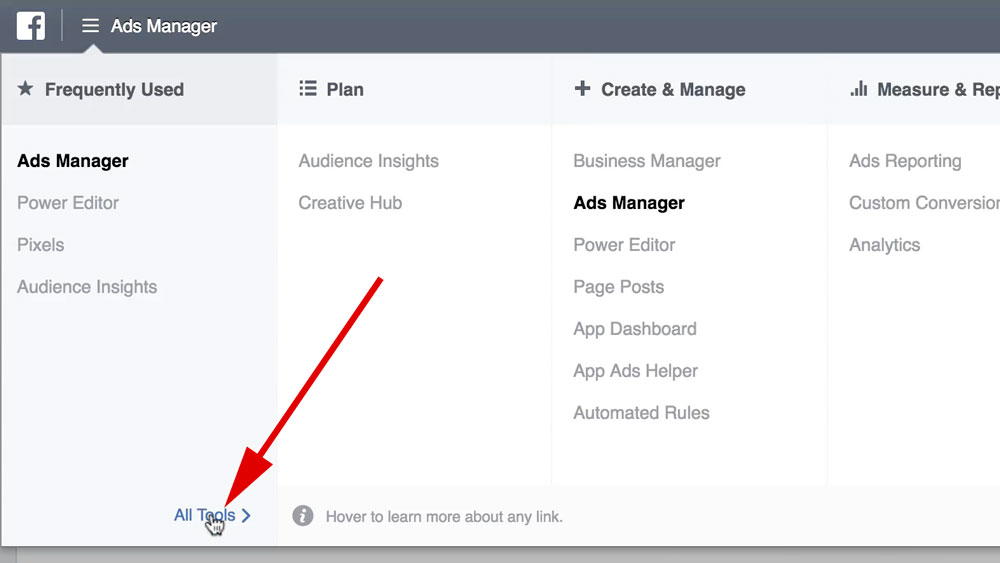
From there click on “Pixels” under “Assets.”
![]()
If this is your first time coming to this page then you will get a screen that looks like the image below. If you see this screen just click on “Create a Pixel.”
![]()
If you see this screen just click on “Create a Pixel”, give your pixel a name (you can just leave it at its default) and click “Next.”
![]()
When you see the screen below just click “Copy and Past the Code.”
![]()
You won’t need anything from the next window.
![]()
From the above screen, just scroll down and close the window.
![]()
Once you’re at the screen pictured above you just need to select your “Pixel ID” (just the numbers). Copy that and head back to your Bigcommerce dashboard.
Step 7: Add your Pixel ID in your Shopify store
![]()
Now take the Pixel ID that you just copied from your Facebook Ads manager and paste it in the field here labeled “Pixel ID.”
![]()
After you paste the Pixel ID in then click the “Save” button in the bottom right of the page.
And you’re done! Your Facebook Pixel is installed in your Bigcommerce store!
Now that it’s installed, Bigcommerce will add the code automatically to every page on your store. It will collect product page visits, products that are added to the shopping cart and product purchases! This will allow you to have much more effective ads, enabling you to retarget previous visitors and buyers, and even create brand new audiences based off of them.
To learn more about how you can use Facebook Ads to grow your online store and get more sales, sign up for our upcoming webinar where we go over the EASY 3-Step Facebook Ads Blueprint That Instantly Increases Your E-Commerce Sales.